Hey! This site is reader-supported and we earn commissions if you purchase products from retailers after clicking on a link from our site.
If you have mildew in your shower and don’t know what to do about it, you are likely wondering what steps will let you get rid of the mildew before it gets any worse. Overlooking the problem could force you to face additional complications that you will want to avoid. Although getting the job done can seem difficult, you can complete the task without much trouble when you follow the right steps and refuse to take shortcuts along the way. Eliminating the mildew can prevent it from spreading and protect your health from a range of illnesses.
See also: How to Remove Calcium Deposits from your Shower Head
Step One: Collect Your Supplies
Before you take the first step to address the mildew, ensure that you have the right supplies on hand because doing so will speed up the process and allow you to get the best results possible. You won’t need to stop working to gather your materials if you organize everything at the start. Here is a list of things you will need:
This is all you will need to work wonders to get the mildew out of your shower for good. Don’t forget to get a scrub brush to scrape mildew off your walls after you have killed or weakened it with the solution you are about to create.
Step Two: Use Vinegar
With your supplies on hand, you are ready to begin, and your mildew won’t know what hit it. Take the empty spray bottle and jar of vinegar to the bathtub to prevent spills. You will then pour the vinegar into the spray bottle, but you don’t want to dilute it because you need the vinegar to have the full effect.
Turn the light on to make it easy for you to find the mildew, and you will spray it with vinegar and let it sit for about an hour. Using your brush, spend 10 or 15 minutes scrubbing your walls and the floor of your shower to achieve a clean and vibrant appearance. If any mildew remains, you will need to repeat the process to get even better results that will make you smile.
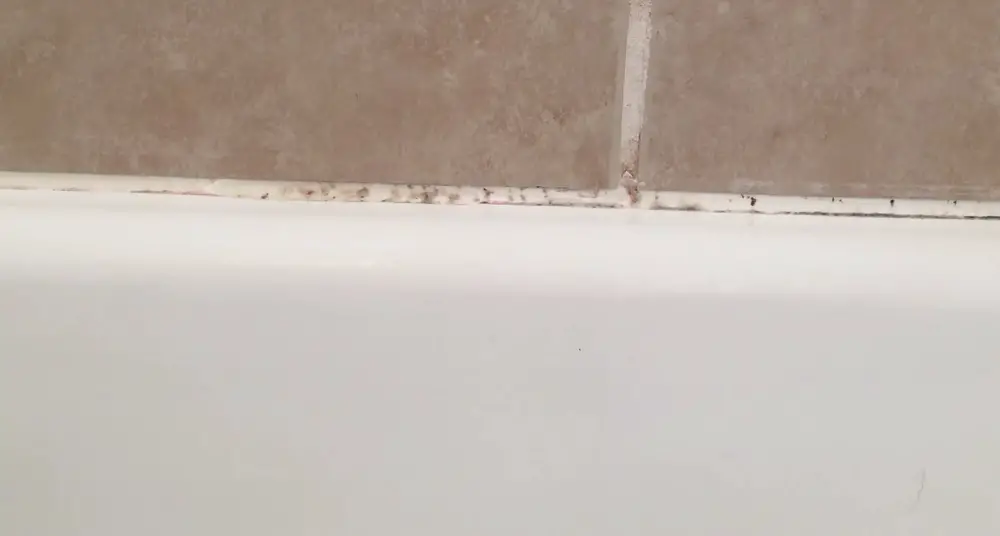
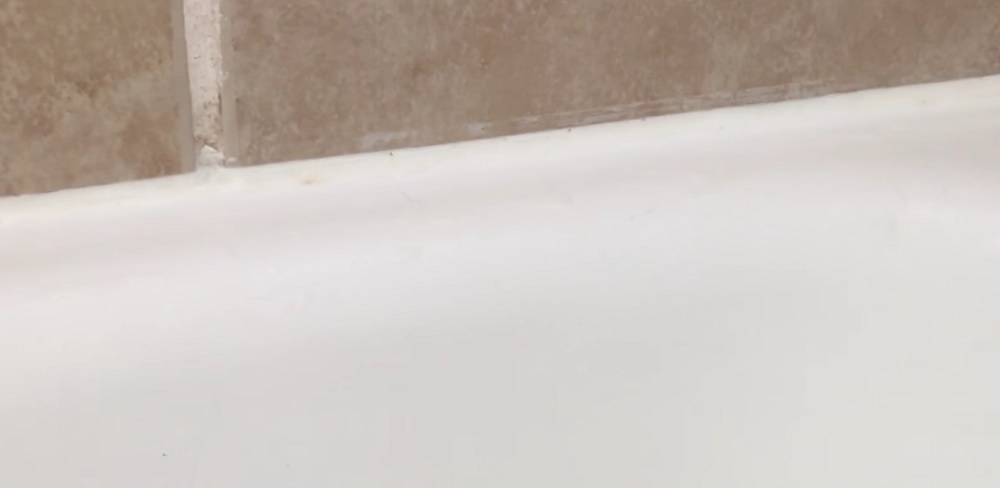
Step Three: Replace Caulk (if needed)
Using vinegar to remove mold won’t always be enough to clean the caulk in your walls, but you are not out of luck. Take a butter knife and remove any caulk that has mildew, using the fresh tube to replace it when you are finished. After you replace your caulk, don’t make the mistake of trying to shower too soon unless you want to ruin your effort. Caulk takes between 12 and 24 hours to dry, so plan for it when you attack the mildew. You can avoid problems by replacing the caulk at night after everyone in the home has already used the shower, and it will be dry by the next time you need to use it.
Read: How to Unclog Your Shower Drain
Step Four: Use Bleach
If you have followed the other steps and still have mildew in your shower, using bleach will do the trick, removing the mildew sooner than you once thought possible. After putting on gloves, you will create a 50-50 solution of water and bleach and put it into a spray bottle. Spraying the mold with the solution and letting it sit for 30 to 60 minutes will kill any mildew that remains.
Final Thoughts
Bleach and vinegar are great tools that you can use to combat mildew and reclaim your shower. Start with vinegar to see if it can get the job done on the first or second try, switching to bleach if needed. Mildew growing on caulk can be stubborn and might not want to come off, so replacing the caulk could be your best option. If you follow these steps and stay focused on your desired outcome, you will achieve impressive results of which you can be proud.
Serious about upgrading your shower? We created a special guide for you. We evaluated hundreds of shower heads and narrowed down our discovery to these 12 shower heads that we think are the best of the best. Whether you love intense high pressure, soothing rainfall, saving water, or rocking out to music in the shower – we’re confident you’ll find the perfect fixture for you.
